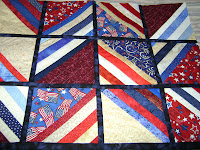
To start with, you need to use a walking foot throughout the process. I have made them with this design and have also made other types of blocks for one side and done the sew and flip for the other side of the quilt sandwich. For joining them, you need to cut strips 1 1/8 wide and 1 3/4 wide.
In this picture, there is the front and back of blocks. You iron the wider strip like you do for the binding with wrong sides together. The strips are then sewn to the right side of the block. I put the folded strip on the front edge and the 1 1/8" strip on the back of the block. Make sure the wrong side of the fabric is facing out on the back. You attach in this manner to each block except the last one in the row.
 The next step is to join the blocks together by attaching the next block to the other side of the 1 1/8" strip. This gives you the sashing on the back of the quilt. Do that to each block in the row.
 The final step is to work on the front of the quilt and fold the 'folded 1 3/4 strip' over to cover the joining of the 2 blocks so it just covers the stitching line of the second block. Use a narrow applique stitch to sew the strip down. You can also hand stitch the folded edge down, but for QOV or Quilts for Kids I machine stitch it because of the amount of washing and wear. This process is repeated for each block joining and to join the rows. I usually work on one row at a time so that I always have the bulk of the project to the left of my machine.

 These are a portion of the first 3 rows completed front and back. When the last row is done all it will need is the binding.


No comments:
Post a Comment